

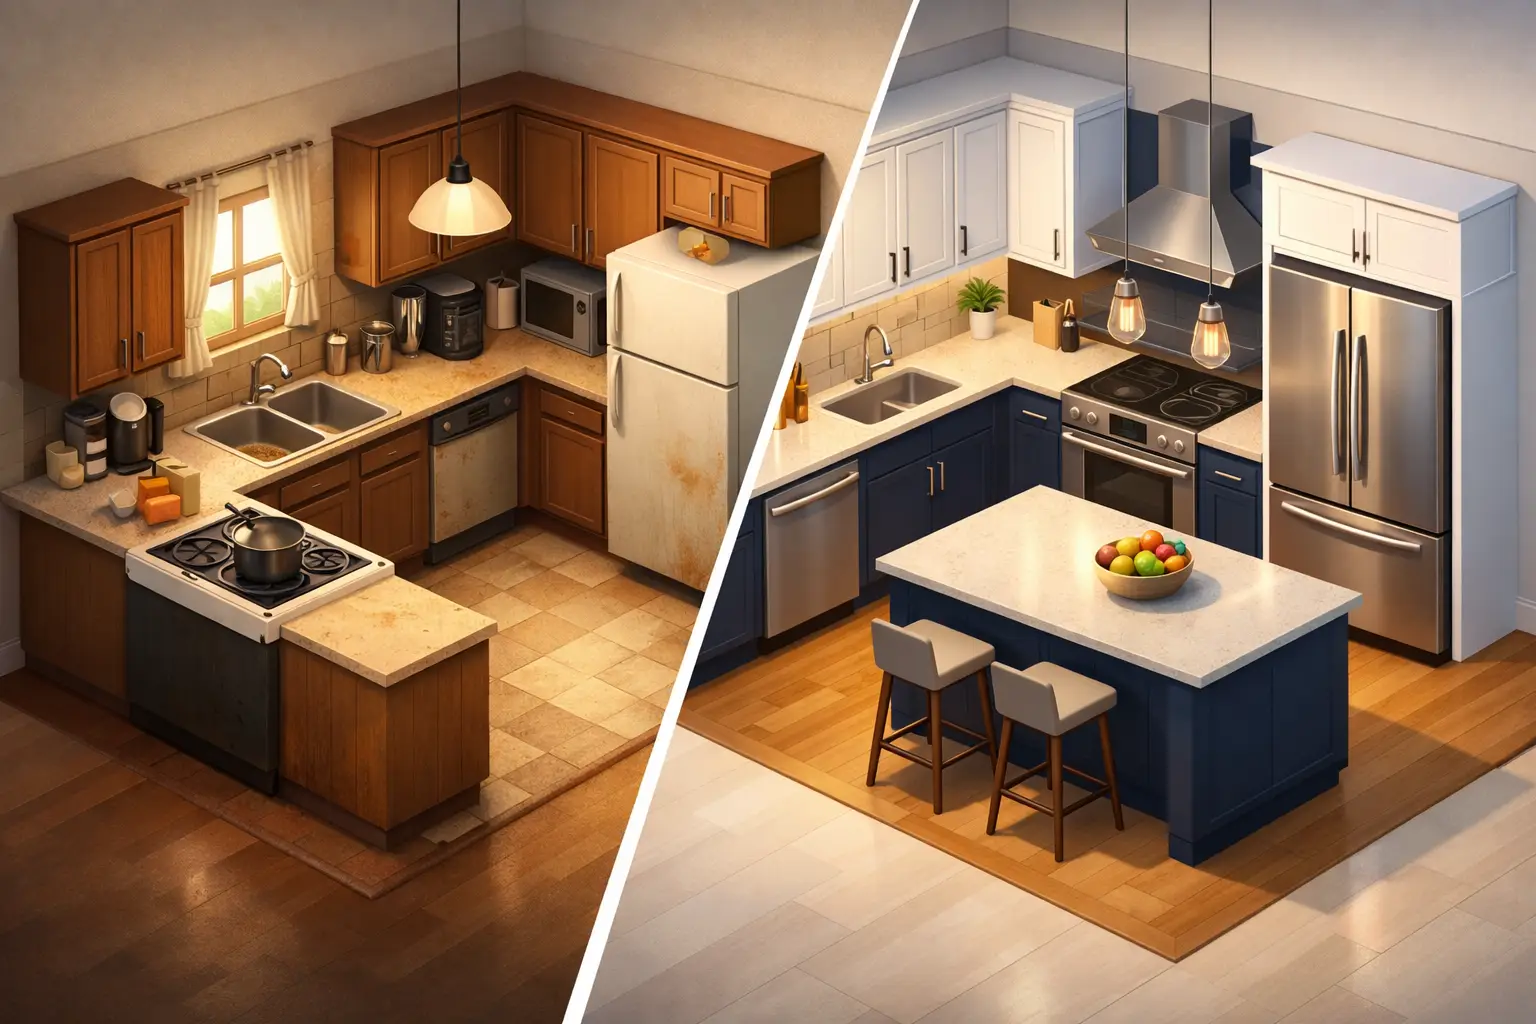
Kitchen Remodel Before and After Examples
A kitchen can look dated long before it stops functioning, but the most meaningful transformations are rarely about replacing cabinet doors or choosing a more current backsplash. The best kitchen remodel before and after examples show how deliberate planning can change circulation, natural light, storage capacity, and the way a home supports everyday life.
For Los Angeles homeowners, a kitchen renovation also has to respond to the realities behind the walls: aging plumbing, electrical capacity, structural conditions, permit requirements, and the expectations of a high-value property. The finished photographs may be striking, but the decisions that create a successful “after” begin well before demolition.
Kitchen Remodel Before and After Examples That Show Real Change
1. The enclosed kitchen becomes a connected living space
Before: Many older homes have kitchens separated from the dining or family room by a full wall, a narrow cased opening, or a peninsula that limits movement. The cook is isolated, sightlines are restricted, and natural light has difficulty reaching the center of the home.
After: Removing or reworking that separation can create a kitchen with an island, a clearer path to the dining area, and a more appropriate relationship between cooking, entertaining, and daily family routines. Wide openings, integrated ceiling details, and consistent flooring can make formerly disconnected rooms feel intentional and cohesive.
The important qualification is structural. A wall that appears simple may carry roof, ceiling, or second-story loads. A professional design-build team evaluates framing, specifies the correct beam or support strategy, and coordinates engineering and permits before construction starts. An open plan should never come at the expense of structural performance or a properly finished ceiling line.
2. Dark, undersized cabinetry gives way to functional storage
Before: A typical kitchen may have short upper cabinets, awkward corner storage, limited drawers, and a pantry that cannot accommodate the household’s actual needs. Dark finishes can make the room feel compressed, especially when paired with minimal window area.
After: Full-height cabinetry, deep drawer bases, pull-out pantry systems, appliance garages, and purpose-built storage bring order to the room without sacrificing a refined appearance. Lighter oak, painted cabinetry, or carefully selected textured finishes can lift the visual weight of the kitchen while preserving warmth.
This type of before-and-after change is often more valuable than it first appears. Better storage reduces countertop clutter, makes the kitchen easier to maintain, and allows premium materials to remain visually prominent. However, more cabinetry is not automatically better. Overbuilding cabinets can close in a room, reduce usable counter space, or interfere with windows and daylight. The right layout balances storage with proportion.
3. A crowded peninsula is replaced with a working island
Before: Peninsulas were common in kitchens designed for a different lifestyle. They can create a dead-end traffic pattern, limit the number of people who can work in the kitchen, and offer seating that feels like an afterthought.
After: A properly sized island can establish a central prep zone, provide seating, conceal storage, and create a natural gathering point. In larger kitchens, it may include a secondary sink, microwave drawer, wine storage, or integrated charging space. In more compact homes, a smaller island or movable worktable may be the better decision.
Clearance is what separates a beautiful island from a frustrating one. There must be room to open appliances, pass behind seated guests, and work safely at the range or sink. A designer should test the space against real dimensions rather than relying on a rendering alone. If the room cannot support an island with proper circulation, improving the perimeter layout may deliver a stronger result.
4. Inadequate lighting becomes layered architectural lighting
Before: One central ceiling fixture, underpowered recessed lights, and shadows over the counter are common in kitchens that have not been updated in decades. Even premium finishes can look flat when the lighting plan is weak.
After: Layered lighting gives the kitchen definition and function. Recessed fixtures provide ambient coverage, under-cabinet lighting improves task visibility, and decorative pendants add scale over an island or dining area. Interior cabinet lighting can elevate glass-front displays, while dimmers allow the room to shift from morning preparation to evening entertaining.
The transformation is not simply cosmetic. Electrical upgrades may be required to support new lighting zones, appliance loads, and code-compliant outlets. In a high-end remodel, fixture placement should also be coordinated with cabinetry, hood design, ceiling beams, and the final furniture plan. A pendant that looks centered on a preliminary plan can feel noticeably off once the island and seating are installed.
5. Builder-grade finishes are replaced with a coordinated material palette
Before: A kitchen may combine worn laminate counters, dated tile, mismatched hardware, and appliances installed without a consistent visual framework. The issue is often not one individual finish but the lack of a complete design direction.
After: Stone countertops with a well-considered edge profile, custom or semi-custom cabinetry, durable flooring, and an integrated backsplash can give the room a tailored, lasting character. The strongest results use fewer materials with greater discipline. A statement slab, for example, can become the focal point when paired with restrained cabinetry and hardware rather than competing patterns.
Material selection should also account for performance. Marble can be exceptional in the right home, but it develops a natural patina and may etch with acidic foods. Quartzite offers a different balance of movement and durability. Porcelain can provide impressive heat and stain resistance. There is no single “best” countertop – there is a best fit for the client’s maintenance expectations, cooking habits, and design priorities.
What the Best Before-and-After Photos Do Not Show
Finished images cannot reveal the work required to make a kitchen reliable for the next several decades. Behind a polished installation may be upgraded electrical panels, new dedicated circuits, relocated plumbing, corrected framing, waterproofing, HVAC modifications, insulation, and permit inspections.
This is where homeowners can encounter the largest difference between a surface-level renovation and a professionally managed remodel. Moving a sink across the room may require slab work or substantial plumbing rerouting. Enlarging a window can trigger structural engineering. Installing a powerful range hood requires an appropriate duct path and makeup air considerations in certain conditions. Each decision affects cost, schedule, and construction sequencing.
A credible project plan identifies these variables early. Existing-condition assessments, field measurements, design coordination, material lead-time management, and permit planning reduce avoidable surprises once the home is under construction. Not every concealed condition can be predicted, particularly in older Southern California homes, but an experienced contractor can establish a clear process for evaluating and resolving issues when they arise.
How to Evaluate Kitchen Remodel Before and After Examples
When reviewing kitchen remodel before and after examples, look beyond the visual contrast. Ask whether the “after” improves how the room works. Can two people cook without colliding? Is there a landing space beside the refrigerator, oven, and sink? Does the island have useful circulation around it? Are upper cabinets, hood placement, and lighting aligned with the architecture of the home?
Also consider whether the design fits the property. A dramatic contemporary kitchen can be compelling in a modern hillside residence, while a traditional home may call for framed cabinetry, warmer metals, and more detailed millwork. The goal is not to copy a photo. It is to create a kitchen that feels appropriate to the home, practical for the owner, and credible in the context of long-term property value.
Turning Inspiration Into a Buildable Scope
Inspiration photos are useful because they clarify preferences, but they do not replace a project scope. A successful kitchen remodel begins by defining priorities: whether the kitchen needs more space, better storage, upgraded appliances, improved entertaining capacity, or a full architectural change to the home’s layout.
From there, a coordinated team can develop plans, selections, and a construction strategy that aligns the design with real site conditions and budget expectations. MDM General Contractor approaches this work through end-to-end management, coordinating design, materials, permits, and construction so homeowners are not left managing separate parties through a complex renovation.
The most compelling after photo is not the one with the most expensive stone or the largest island. It is the kitchen that performs beautifully every day, fits the home with precision, and was built with the level of planning required to last.